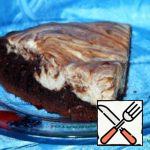
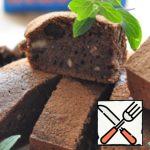
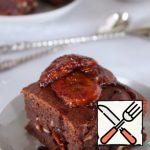
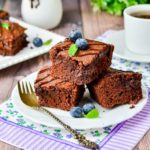
Brownies with Banana and Cocoa in the Oven
An incredibly delicious chocolate treat without sugar! Brownie with banana and cocoa in the oven is a porous soft and airy pie that consists of only five ingredients! The dough is kneaded in just five minutes, and the oven does the rest.
Servings Prep Time
4 5minutes
Cook Time Passive Time
1hour 40-45minutes
Servings Prep Time
4 5minutes
Cook Time Passive Time
1hour 40-45minutes
Ingredients
Instructions
  1. How to make oven-baked brownies with banana and cocoa? It’s quick and easy! First, gather all the necessary ingredients as per the list. Choose bananas that are soft but not overly ripe, with a rich yellow skin color and no black spots. Use large, fresh eggs for best results.
  2. Peel the ripe bananas and break them into small pieces.
  3. In a blender, combine the banana pieces, eggs, cocoa, and baking powder. Can baking powder be substituted with baking soda? It’s not recommended in this recipe since there’s no acidic component to activate the soda. Baking powder works perfectly fine here. If desired, you can add a little heat-resistant sweetener, although the natural sweetness from bananas is usually sufficient.
  4. Blend all the ingredients until completely smooth. Ensure there are no banana chunks left in the batter, and the eggs are thoroughly beaten.
  5. Pour the smooth batter into a baking dish lined with parchment paper (about 14-16 cm in diameter). Place the brownies in a preheated oven at 170°C and bake for 40-45 minutes. Test the doneness by inserting a wooden skewer into the center – it should come out slightly moist but clean, without any doughy residue. Oven performance may vary, so adjust time and temperature accordingly.
  6. Once the brownies are baked, place pieces of dark or bitter chocolate on top of the still-hot cake. Let it sit for 2-3 minutes to soften the chocolate, then spread it evenly over the surface using a spatula. Alternatively, you can melt the chocolate beforehand and pour it over the hot cake.
  7. Allow the brownie to cool completely in the pan, then carefully remove it and transfer to a serving plate. The texture may vary from finely porous and airy to larger-pored, depending on your oven and the blending time of the eggs. Enjoy your delicious treat!
Recipe Notes

Keep in mind that everyone’s ovens are different. The temperature and cooking time may vary from those specified in the recipe.

Any heat-resistant mold is suitable for this recipe. If you’re using a silicone mold, there’s no need to grease it with butter or margarine. However, it’s advisable to lightly coat metal, ceramic, or glass dishes with vegetable oil to prevent the baked goods from sticking and burning.

0 0 votes
Article Rating