Roll out the dough between two sheets of baking paper with a flat rolling pin. The size of the dough is approximately 37X37 cm. Roll out the dough so that it covers the mold. Roll out the dough from the center to the edges, avoiding the formation of folds on the paper, to do this, lift the paper so that it sticks, and roll out the dough further.
It is very important not to roll out the dough like on a honey cake – back and forth. Just roll out the dough from the center to the edges. In my case, the foundation was thin, I like it that way. But there are people who like the pie itself to be thicker, respectively, and roll out the dough thicker.
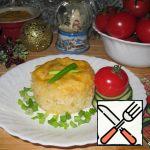 Rice Casserole with Chicken and Sun-Dried Tomatoes Recipe
 Rosy Pies with Sun-Dried Tomatoes Recipe
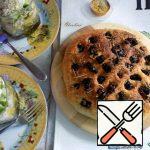
 Focaccia with Rosemary and Sun-Dried Tomatoes Recipe
 Focaccia with Sun-Dried Tomatoes Recipe
 Scones with Feta and Sun-Dried Tomatoes Recipe
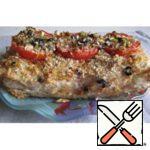
 Stuffed Leg with Mozzarella and Sun-Dried Tomatoes Recipe
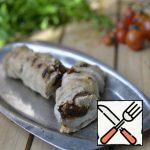 Grilled Turkey Roll with Sun-Dried Tomatoes Recipe
 Muffins with Mussels and Sun-Dried Tomatoes Recipe
 Chicken Terrine with Rice Balls and Sun-Dried Tomatoes Recipe
 Pumpkin Pesto with Sun-Dried Tomatoes Recipe
 Creamy Chicken with Sun-Dried Tomatoes Recipe
 Quiche with Chicken, Mushrooms and Broccoli Recipe