
| Prep Time | 5 minutes |
| Cook Time | 2 hours |
| Passive Time | 1 hour |
| Servings |
|
Ingredients
- 0.5 liter Water
- 5.5 gram Dry yeast
- 1 teaspoon Salt
- 1 teaspoon Sugar
- 500 gram Wheat flour / Flour
- 1 teaspoon Vegetable oil
Ingredients
|
|
Instructions
- How to make homemade bread in a frying pan? Gather your ingredients. The amount of flour provided is approximate; you may need more or less depending on the dough's consistency. Check out separate articles at the end of the recipe to learn more about flour properties and yeast usage.

- Take a large bowl, as you'll be working with a significant amount of dough. Warm the water to about 38°C (100°F); this should feel pleasantly warm to the touch. It's in this water that the yeast will activate and start working. In colder water, the yeast won't activate, while in hot water, they'll be killed. Add yeast, sugar, and salt to the warm water, and mix them together.
; this should feel pleasantly warm to the touch. It's in this water that the yeast will activate and start working. In colder water, the yeast won't activate, while in hot water, they'll be killed. Add yeast, sugar, and salt to the warm water, and mix them together.")
- Begin adding flour in portions, sifting it through a sieve. This helps aerate the flour and results in a softer, fluffier dough. After each addition, thoroughly mix the dough with a whisk. The dough will become thicker with each addition. When the whisk becomes ineffective, switch to using a spoon.

- Continue kneading the dough with your hands. While you can use a mixer, we're making bread without an oven, so let's use our hands. Keep adding flour, but do so gradually. Observe the dough; it should not be too liquid but should not be too firm either. Stop kneading as soon as the dough starts to come off your hands. I used more than 500 grams of flour, but your requirement may differ.

- Form the dough into a ball, cover the bowl, and place it in a warm spot for an hour to allow it to rise. I placed the bowl in a cold, unused oven, which is warm and draft-free.

- After an hour, the dough should have doubled in size. Gently press it with your fingers.

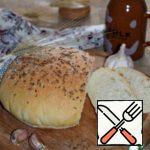
- Take a frying pan with a thick bottom; this is essential for proper bread baking. Grease the bottom and sides of the pan with vegetable oil. Even if you have a non-stick frying pan, it's a good precaution to grease it.

- Transfer the dough to the frying pan and use your hands to spread it evenly across the bottom. Cover the pan with a lid and let it sit for another half-hour.

- The dough will rise again. Turn the stove to the lowest possible heat setting. Place the pan on the stove and cover it with a lid. Fry the bread for about half an hour, being careful not to let it burn. If you have a transparent lid, avoid lifting it too often to ensure the bread rises well.

- Once one side is nicely browned, flip the bread to cook the other side. Fry the bread for another half-hour, this time without the lid.

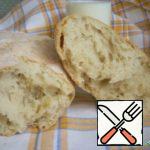
- Remove the finished bread from the pan and wrap it in a towel for an hour. After an hour, the bread will cool down and will be ready to eat. Enjoy!


; this should feel pleasantly warm to the touch. It's in this water that the yeast will activate and start working. In colder water, the yeast won't activate, while in hot water, they'll be killed. Add yeast, sugar, and salt to the warm water, and mix them together.")


Recipe Notes
I never thought it was possible to bake real bread in a frying pan, but this recipe turned out amazing. It even has a crispy crust. Absolutely delicious!
Be aware that the amount of flour needed may vary, so focus on achieving the desired dough consistency rather than strictly following the flour measurement.
When preparing this bread, it's preferable to use filtered or bottled water with a neutral taste. If using tap water, keep in mind that it can impart an unpleasant flavor to the dish.
Lastly, choosing the right frying pan is crucial for the success of this recipe. An improperly selected pan can adversely affect the outcome, so make sure you have a suitable one on hand.
Related posts:
 Italian Frying Pan with Minced Meat, Vegetables and Rice Recipe
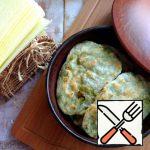 Simple Tortillas with Herbs in a Frying Pan Recipe
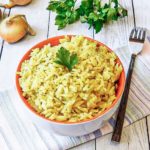 Crumbly Rice in a Frying Pan Recipe
 Fluffy Cottage Cheese Pancakes with Flour in a Frying Pan Recipe
 Liver with Onions in a Frying Pan Recipe
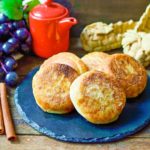 Classic Cheesecakes in a Frying Pan
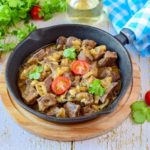
 Pork Goulash With Gravy in a Frying Pan
 Homemade Bread Recipe
 Homemade Garlic Bread Recipe
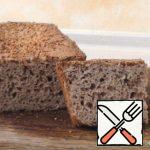 Homemade Gluten-Free Buckwheat Bread Recipe
 Vegetable Caviar “On a Frying Pan” Recipe
 Chicken Fillet in Parchment in a Frying Pan Recipe