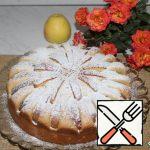
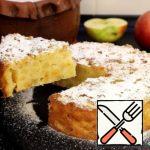
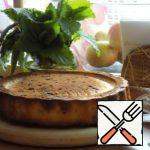
Delicious, simple, the best pastries for the whole family! You will like a lush charlotte with apples the first time. She has one secret that makes her very airy, delicate, tall. It will take no more than 10 minutes to cut the fruit and knead the dough, the rest of the time the pie will be baked in the oven.

| Prep Time | 10 minutes |
| Cook Time | 1 hour |
| Passive Time | 30 minutes |
| Servings |
|
Ingredients
- 200 gram Wheat flour / Flour
- 200 gram Sugar
- 4 pieces Eggs
- 3 pieces Apples
- 1 teaspoon Baking powder
Ingredients
|
|
Instructions
- Making a fluffy apple charlotte is easy! Begin by gathering all the necessary ingredients. You can use apples of the same variety or mix different ones, as long as they are delicious, fragrant, and juicy. Opt for large, high-quality eggs. If your eggs are small, it's advisable to use an extra one. For more details on creating a fluffy sponge cake and understanding different oven functions, refer to separate articles provided at the end of this recipe.

- Use a mixer to beat the eggs until they form a light foam. Gradually add sugar in small portions and continue beating until the mixture becomes fluffy, which should take about 3-5 minutes. To check the consistency of the beaten eggs, draw a line along the mass with a spatula. If the trace lasts 1-2 seconds, the eggs are whipped to the desired consistency. If the trace disappears instantly, continue whipping slightly. Be careful not to overbeat the eggs; small bubbles should still be visible on the surface.

- Sift the flour along with the baking powder into a separate bowl. Sifting is essential as it infuses the flour with oxygen, resulting in a lighter dough. If you have time, it's even better to sift the flour twice.

- While continuing to beat the eggs at low speed, gradually add the sifted flour to the mixture in portions. The amount of flour needed may vary. For additional information about flour, refer to the article provided at the end of this recipe. If you beat at high speeds, the dough may become heavy and lose its lightness because prolonged beating causes the eggs to become denser, expelling oxygen from the mixture. You can also use a spatula, but a mixer ensures better and more even dough mixing.

- The dough should resemble thick sour cream while retaining some air bubbles, although not as many as before adding the flour.

- Wash the apples, peel them, remove the core, and cut them into medium-sized pieces. If the apple peels are thin, you can leave them intact, as I did.

- Add the prepared apple pieces to the dough and gently fold everything together with a spatula.

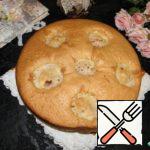
- Line a 20-22 cm mold with parchment paper and lightly grease the bottom (but not the sides) with butter. Pour the dough into the mold and level it. If desired, sprinkle a thin layer of sugar evenly on top of the dough. I opted not to add sugar since the dough was already sweet. Bake the charlotte in a preheated 180°C oven for approximately 40-50 minutes. Avoid opening the oven door during the first 25 minutes to prevent the pie from collapsing. To check for readiness, insert a wooden skewer into the charlotte; it should come out dry.
 with butter. Pour the dough into the mold and level it. If desired, sprinkle a thin layer of sugar evenly on top of the dough. I opted not to add sugar since the dough was already sweet. Bake the charlotte in a preheated 180°C oven for approximately 40-50 minutes. Avoid opening the oven door during the first 25 minutes to prevent the pie from collapsing. To check for readiness, insert a wooden skewer into the charlotte; it should come out dry.")
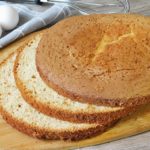
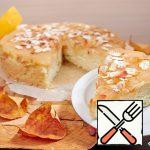
- Remove the finished apple charlotte from the mold, allow it to cool slightly, slice it into portions, and serve. Enjoy your meal!


 with butter. Pour the dough into the mold and level it. If desired, sprinkle a thin layer of sugar evenly on top of the dough. I opted not to add sugar since the dough was already sweet. Bake the charlotte in a preheated 180°C oven for approximately 40-50 minutes. Avoid opening the oven door during the first 25 minutes to prevent the pie from collapsing. To check for readiness, insert a wooden skewer into the charlotte; it should come out dry.")

Recipe Notes
You can adjust the amount of sugar to suit yourself. For someone, 200 grams will seem too much, in this case, reduce it to 150-180.
Be prepared for the fact that you may need more or less flour than indicated in the recipe. Focus not on the amount of flour, but on the desired consistency of the dough.
Keep in mind that everyone's ovens are different. The temperature and cooking time may differ from those indicated in the recipe.
Important! The size of the mold must match the number of ingredients. If you do not have a shape with a diameter suitable for the recipe or you want to bake a pie or cake of a larger or smaller size, make the correct calculations and make no mistake.
Related posts:
 Cottage Cheese Charlotte with Apples Recipe
 Charlotte with Large Apples Recipe
 Lush and Simple Sponge Cake in the Oven
 Apple Pie “Charlotte” Recipe
 Simple Apple Pie with Rhubarb and Apples Recipe
 Apple Charlotte with Cranberries on Kefir Recipe
 Apple-Coconut Charlotte on Sour Cream Recipe
 Charlotte with Melon “Seasonal” Recipe
 Charlotte from Stale Easter Cake Recipe
 Carrot-Nuts Charlotte Recipe
 A Whole Goose with Apples in the Oven with a Crispy Crust Recipe
 Simple Pie Recipe