
| Prep Time | 1 hour |
| Cook Time | 4 hours |
| Passive Time | 4 days |
| Servings |
|
- 500 gram Wheat flour / Flour
- 200 milliliters Milk
- 100 gram Sugar
- 300 gram Butter 200 g in the dough, 100 g for greasing the finished Stollen
- 1 pieces Egg yolk
- 30 gram Yeast
- 200 gram Sugar powder
- 300 gram Raisin
- 150 gram Almond
- 30 milliliters Cognac
- 1 teaspoon Orange zest
- 1 teaspoon Vanilla essence or Vanilla sugar
Ingredients
|
|
- Commence the process of baking Christmas stollen by soaking the raisins, peeled nuts, and zest in cognac and vanilla tincture in advance (preferably the night before). If you are using vanilla sugar, add it directly to the dough. Peel almonds by pouring hot boiled water over them and letting them sit for 10-15 minutes. The nut shells will swell, making them easy to remove by hand.
. If you are using vanilla sugar, add it directly to the dough. Peel almonds by pouring hot boiled water over them and letting them sit for 10-15 minutes. The nut shells will swell, making them easy to remove by hand.")
- Prepare all the necessary ingredients for the dough.

- Combine butter with milk. Gradually heat the milk to melt the butter. This can be done on the stovetop in a saucepan or in the microwave.

- Add sugar to the milk mixture and stir until completely dissolved.

- Once the mixture has cooled slightly, add the yolk and mix.

- Sift the flour. Add fresh pressed yeast and blend them with flour into fine crumbs. If using new yeast, consider activating it to check for viability. To do this, dilute the yeast in 100 ml of warm water, add 1 tsp sugar, and let the mixture sit for 15 minutes. If a foam cap appears, the yeast is good; if not, there's a possibility the yeast is weak or no longer viable.

- Pour the cooled milk mixture into the flour mixture and knead to form a soft dough.

- Knead the dough thoroughly for 7-10 minutes. Place the kneaded dough in a bowl, cover it with a napkin, and let it rise for 1-1.5 hours until it doubles in volume.

- Knead the risen dough well.

- Place the dough on the table and begin incorporating dried fruits and nuts soaked in cognac.

- Cover the dough with a napkin and let it rise for an additional 30-40 minutes. Preheat the oven to 175 degrees Celsius during this time.

- Divide the dough into two equal parts.

- Stretch each part into a rectangle.

- Using the palm of your hand, create an oblong depression on the dough, starting a third from the edge. Fold the smaller part of the dough into the larger one along the depression, forming the stollen.

- Transfer the stollen shapes to a parchment-lined baking sheet and let them proof for about 20 minutes. Bake the stollens in a preheated 175°C oven for approximately 40 minutes.

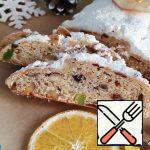
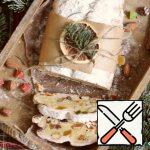
- While the stollens are still hot, generously brush them with melted butter and dust with powdered sugar. Allow them to cool completely.

- Traditionally, carefully wrap the stollen in foil or parchment, place it in an airtight container, and store it in a cool place for at least 2 weeks. Enjoy your meal!

. If you are using vanilla sugar, add it directly to the dough. Peel almonds by pouring hot boiled water over them and letting them sit for 10-15 minutes. The nut shells will swell, making them easy to remove by hand.")


Be prepared for the possibility that you might need more or less flour than specified in the recipe. Focus on achieving the desired consistency of the dough rather than fixating on the exact amount of flour.
Keep in mind that individual ovens may vary. The temperature and cooking time may deviate from those stated in the recipe.
It's crucial to sift the flour to aerate it with oxygen. This step ensures that the baked goods turn out light and rise well during baking.
To melt butter in the microwave, cut it into small pieces and place it in a microwave-safe container. To prevent splattering during heating, cover the container with a paper towel. Melt the butter at the lowest power or in defrosting mode. Initially, five seconds may be sufficient. If the butter hasn't melted, repeat the process in 5-second intervals until the desired result is achieved.
For melting butter using a water bath, you'll need two containers of different diameters. Pour water into the larger container and place it on the stove. Position the smaller container on top, ensuring it is partially submerged in the water. Add the sliced butter to the smaller container. As the water boils, the butter will gradually melt. Stir the butter slightly to expedite the process. Once the butter pieces are completely dissolved, remove the container from the stove.
Related posts:
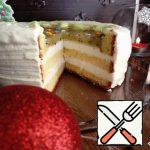
 Christmas Stollen Cottage Cheese Recipe
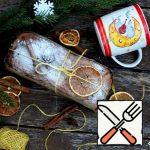
 Classic Yeast Stollen Recipe
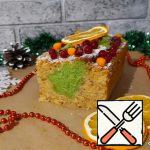 Christmas Cake “Christmas Tree” Recipe
 Cheese Stollen Recipe
 Sponge Cake “Christmas Tree” with Marshmallows Recipe
 Christmas Pudding Recipe
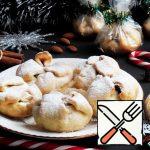 Christmas Cookies Recipe
 Christmas Cottage Cheese Non-Yeast Cupcake Recipe
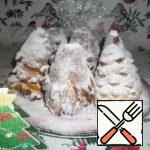
 Cake “Christmas Tree in the Snow” Recipe
 Christmas Wreath Cake Recipe
 Christmas Tree Meringue Cake with Tropical Kurd Recipe
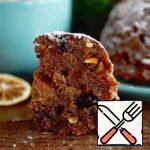
 Christmas Cake with Dried Fruit Recipe