This roll was invented by a Japanese pastry chef a year and a half ago. Since then, the recipe has undergone many changes, this option seemed to me the simplest - quick and easy to execute, but believe me, the roll turned out to be no less tasty and beautiful. You can use any cream - whipped cream, sour cream, cottage cheese, in general - a lot of room for imagination!

| Cook Time | 60 minutes |
| Servings |
|
Ingredients
Sponge:
- 4 pieces Egg yolk
- 4 pieces Egg white
- 130 gram Sugar powder
- 1 pinch Salt
- 10 gram Corn oil
- 40 ml Milk
- 14 gram Cocoa powder
- 65 gram Flour wheat / Flour
Cream:
- 150 gram Butter
- 80 gram Condensed milk
- 1 gram Vanilin
Ingredients
Sponge:
Cream:
|
|
Instructions
- Using a whisk, beat the yolks with powdered sugar 30 g).
.")
- Add the butter and milk and beat.

- Add the flour and mix well.

- Visually divide the dough into 2 equal parts. Add the sifted cocoa to one and mix. The dough turns out thick and viscous. The second part of the test is left as is.

- Whisk the whites with salt and powder (100 g) until stable peaks.
 until stable peaks.")
- Add a couple of spoonfuls of whipped whites to both types of dough and mix with a spatula.

- Visually divide the remaining whipped whites into 2 parts. Add one to the light...

- ... and the second in the chocolate batter. Gently mix with a spatula.

- Form the size of 24x21 cm cover with baking paper. If you doubt its quality, smear with oil. Place the light dough in the form and distribute it evenly.

- Put the chocolate dough on top. For convenience, I put the dough in a food bag (for cooking), cut off the tip and thus applied the dough, which can then be adjusted with a spatula.
, cut off the tip and thus applied the dough, which can then be adjusted with a spatula.")
- To apply the pattern, we need this fork (spoon), i.e. with a straight and wide tip (1 cm or slightly wider) For convenience, we call our spoon (fork) "spatula".
, i.e. with a straight and wide tip (1 cm or slightly wider) For convenience, we call our spoon (fork) \"spatula\".")
- So, we start drawing from the very edge of the narrow (21 cm) part of the form. Perpendicularly dip the "spatula" into the dough so that it touches the very bottom.
 part of the form. Perpendicularly dip the \"spatula\" into the dough so that it touches the very bottom.")
- We bring it to the opposite end of the mold and, without removing the "blade" from the dough, we make a U-turn to the width of the "blade" 1-1.5 cm. and again we bring the "blade" to the opposite edge of the mold, so to the very end. Without removing the "spatula" from the dough, we make a U-turn, and starting from the very edge, we draw already on the long (24 cm) side of the mold, just as we drew on the short side.
 side of the mold, just as we drew on the short side.")
- I tried to depict the action in the drawing, I think it is clearer this way. Start drawing on the short (21 cm) side
 side")
- Continue drawing on the long side (24 cm).
.")
- Bake in a preheated 175*C oven for 20-25 minutes. Check for a dry stick. Focus on your oven! Ready-made sponge cake to get out of the mold and free from paper...

- ... turning on a clean sheet of chocolate dough down.

- Place a rolling pin on the longer edge of the biscuit and roll with it..

- Cool. (We don't take out the rolling pin, it's just not visible in the photo) The sponge cake is very tender, airy and elastic. Don't worry that it is high ( otherwise the drawing would not be visible), it is very easy to roll.

The sponge cake is very tender, airy and elastic. Don't worry that it is high ( otherwise the drawing would not be visible), it is very easy to roll.")
- Cream: Beat the butter at room temperature with the vanilla until fluffy. Without ceasing to beat, enter the condensed milk in 2 doses.

- The cream is very airy. And when it freezes, it tastes like an ice cream sundae In a Cup with a rose of cream on top, remember?

- Expand the roll, remove the rolling pin )) I spied a cool idea of how easy and beautiful it is to fill a roll with cream. You just need to put it together with baking paper in the form in which it was baked and press the side of another form, so that the edges of the roll do not unfold.
)
I spied a cool idea of how easy and beautiful it is to fill a roll with cream. You just need to put it together with baking paper in the form in which it was baked and press the side of another form, so that the edges of the roll do not unfold.")
- Place the cream in a cooking bag and set it on a biscuit.

- Remove from the form. Carefully connect the edges and wrap in paper. Place in the refrigerator for a few hours.

- Free the frozen roll from the paper (together with it I took off the top crust of the biscuit, I forgot to sprinkle a clean sheet with powdered sugar), but it turned out quite beautifully, in my opinion, of course. Cut the roll into portions.
, but it turned out quite beautifully, in my opinion, of course.
Cut the roll into portions.")
- And enjoy.

- Bon appetit.

.")


 until stable peaks.")


, cut off the tip and thus applied the dough, which can then be adjusted with a spatula.")
, i.e. with a straight and wide tip (1 cm or slightly wider) For convenience, we call our spoon (fork) \"spatula\".")
 part of the form. Perpendicularly dip the \"spatula\" into the dough so that it touches the very bottom.")
 side of the mold, just as we drew on the short side.")
 side")
.")


The sponge cake is very tender, airy and elastic. Don't worry that it is high ( otherwise the drawing would not be visible), it is very easy to roll.")


)
I spied a cool idea of how easy and beautiful it is to fill a roll with cream. You just need to put it together with baking paper in the form in which it was baked and press the side of another form, so that the edges of the roll do not unfold.")


, but it turned out quite beautifully, in my opinion, of course.
Cut the roll into portions.")

Related posts:
 Biscuit Roll “Fantasy” Recipe
 Biscuit Roll with Halva Recipe
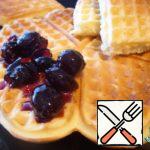 Biscuit Waffles Recipe
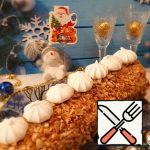
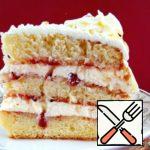 Biscuit Cake “Festive mood” Recipe
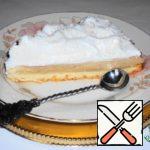 Biscuit with Coffee Parfait and Meringue Cream Recipe
 Chocolate Fondue with Cottage Cheese Biscuit and Fruit Recipe
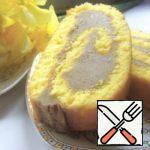
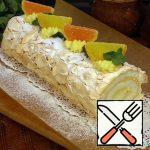 Meringue Roll with Lemon Cream Recipe
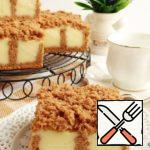 Biscuit with Vanilla Pudding Recipe
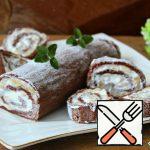
 Roll with Chocolate-Curl Recipe
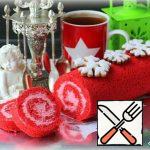 Roll “Red Velvet” Recipe
 Chocolate Roll without Flour and Sugar Recipe
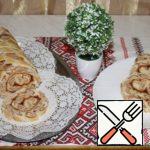
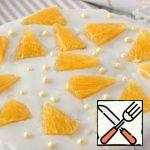 Orange Biscuit with Dried Apricots Recipe