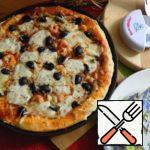
I share my family pizza recipe. Stored since autumn, baked and frozen sweet peppers allow you to make this pizza on any winter day and delight us with its sweet taste. A large amount of baked pepper makes this dish not only fragrant, sweet, but also quite useful. It is healthier than regular pizza, as the dough is made from a mixture of unbleached wheat flour and wholemeal flour; the filling contains more pepper, does not contain any smoked meat, and the cheese is not baked under direct heating of the upper spiral of the oven. Less trans fat is formed, since this dish is sprinkled with cheese 10 minutes before cooking, so that it melts, but does not dry out (so that the fat does not separate from it as in ordinary purchased pizzas). This dish is slightly sweet due to the pepper and spicy due to the spices.

| Cook Time | 200 minutes |
| Servings |
|
Ingredients
- 1,5 glass Flour wheat / Flour
- 1 glass Whole grain flour
- 1 tablespoon vegetabe oil
- 1/3 tablespoon Sugar
- 0,5 teaspoon Salt
- 1 glass Water
- 155 ml Tomato paste
- 6 pieces Sweet pepper large
- 0,5 bunch Dill
- 300 ml Mozzarella
- 1 teaspoon Coriander
- 1 teaspoon Oregano
- 1 teaspoon Basil
- 1 teaspoon Thyme
- teaspoon Dry yeast
Ingredients
|
|
Instructions
- Prepare the ingredients for the dough. Note: if fresh pepper is used, it should be washed and cleaned of seeds and petioles. Cut into 2 halves and bake for 30 minutes at 170C. I usually stack the pepper halves quite tightly together (vertically). If the pepper is not so much or loosely laid, then the baking time may take 10 minutes less. The purpose of baking: to make the pepper soft and slightly dried. You don't need to turn it black, as many chefs do (we need to preserve the healthy vitamins, not just get fried sugar from the pepper). Then dry it a little at 100C for another 30 minutes. If time permits, you can let it cool in the oven. If you prepare it for the winter (as I do), then you can put it in plastic bags/jars and store it in the freezer. Its taste does not change when thawed. The excess juice can be drained by holding the pepper in a colander (you can do this twice: before and after cutting into small pieces) to drain it even more. The juice is very sweet and delicious. You can drink it anyway. If you want to get a thinner pizza-tart, then the number of ingredients can be proportionally reduced by 1.5 times.
. If the pepper is not so much or loosely laid, then the baking time may take 10 minutes less. The purpose of baking: to make the pepper soft and slightly dried. You don't need to turn it black, as many chefs do (we need to preserve the healthy vitamins, not just get fried sugar from the pepper).
Then dry it a little at 100C for another 30 minutes. If time permits, you can let it cool in the oven. If you prepare it for the winter (as I do), then you can put it in plastic bags/jars and store it in the freezer. Its taste does not change when thawed. The excess juice can be drained by holding the pepper in a colander (you can do this twice: before and after cutting into small pieces) to drain it even more. The juice is very sweet and delicious. You can drink it anyway.
If you want to get a thinner pizza-tart, then the number of ingredients can be proportionally reduced by 1.5 times.")
- Knead the dough by hand and let it stand in a warm place for about 1 hour. We use warm water (30-35C if possible). Or you can knead it in a bread maker (as in my case) in the kneading mode. I let the dough knead for 7-10 minutes and turn off the machine. During this time, the bread maker heats the dough additionally, which is an advantage if the room is cold. And leave the dough for an hour in the machine turned off. Note on flour: flour dryness and density may vary depending on the country of origin. This recipe uses white, unbleached flour, which may not be as dry as bleached flour. When preparing the dough, you may need a little more or less water. After kneading, you should get a soft, slightly sticky dough, so I recommend gradually adding flour if you cook with bleached flour for the first time according to this recipe.
. Or you can knead it in a bread maker (as in my case) in the kneading mode. I let the dough knead for 7-10 minutes and turn off the machine. During this time, the bread maker heats the dough additionally, which is an advantage if the room is cold. And leave the dough for an hour in the machine turned off.
Note on flour: flour dryness and density may vary depending on the country of origin. This recipe uses white, unbleached flour, which may not be as dry as bleached flour. When preparing the dough, you may need a little more or less water. After kneading, you should get a soft, slightly sticky dough, so I recommend gradually adding flour if you cook with bleached flour for the first time according to this recipe.")
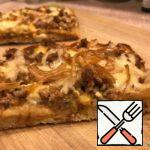
- Then roll out the dough. I used 2 oblong shapes (28 x 23 cm, shown in the photo and 23 x 12 cm). We make medium-sized sides (about 2 cm) to fit the filling. We give the dough to come up in a warm place for another 30 minutes (I usually do this in a warm oven, where the minimum heating of the spiral was temporarily turned on for 2-3 minutes).
. We make medium-sized sides (about 2 cm) to fit the filling. We give the dough to come up in a warm place for another 30 minutes (I usually do this in a warm oven, where the minimum heating of the spiral was temporarily turned on for 2-3 minutes).")
- Preparing the filling. We crumble the baked pepper into small pieces. We allow the juice to drain, which can be drunk regardless of this dish. My dill several times and finely crumble. Grate the cheese. Note: if you are concerned about the pepper skins in the dish, you can pre-peel the pepper from them. Even after baking it is not black, this can also be done. If necessary, a knife can help. The number and name of the spices can be changed to suit your taste. You can take a mixture of spices or reduce their amount if you do not like spicy dishes.

- Spread the tomato paste evenly on the dough cakes, trying not to press the slightly raised dough.

- Evenly distribute the pieces of pepper and sprinkle with dill and spices. If desired, you can take less spices. Bake in the oven (shelf closer to the top, heating from the bottom) at 175C for 20 minutes. I didn't preheat the oven. Note: in the absence of cheese at this stage, the pepper will dry better.
 at 175C for 20 minutes. I didn't preheat the oven.
Note: in the absence of cheese at this stage, the pepper will dry better.")
- Sprinkle with cheese. We continue to bake for another 10 minutes, so that the cheese melts. Note to cheese for lactovegetarians: Choose a cheese made with rennet of bacterial or vegetable origin. You can increase the amount of cheese if you want to get a more high-calorie and festive option.

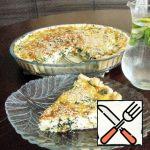
- The pizza is ready. It should be allowed to cool down a little. I usually cover it with aluminum foil. The outer part of the finished dish is crispy, and the inner part is airy and soft. Store in a tightly sealed plastic box in the refrigerator. It is convenient to heat it in the microwave. Note: it is not recommended to eat this dish immediately, as well as any other bakery products that have just been taken out of the oven, since you can not eat any hot food that can harm the esophagus.

. Or you can knead it in a bread maker (as in my case) in the kneading mode. I let the dough knead for 7-10 minutes and turn off the machine. During this time, the bread maker heats the dough additionally, which is an advantage if the room is cold. And leave the dough for an hour in the machine turned off.
Note on flour: flour dryness and density may vary depending on the country of origin. This recipe uses white, unbleached flour, which may not be as dry as bleached flour. When preparing the dough, you may need a little more or less water. After kneading, you should get a soft, slightly sticky dough, so I recommend gradually adding flour if you cook with bleached flour for the first time according to this recipe.")
. We make medium-sized sides (about 2 cm) to fit the filling. We give the dough to come up in a warm place for another 30 minutes (I usually do this in a warm oven, where the minimum heating of the spiral was temporarily turned on for 2-3 minutes).")
Related posts:
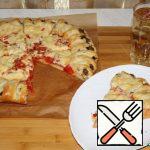
 Pizza with Shrimp and Cheese Recipe
 Pizza Dough Cold Fermentation Recipe
 Tuscan Pizza with Vegetables Recipe
 A La Pizza with Pumpkin Recipe
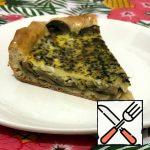 Mushroom Tart with Dried Onion Recipe
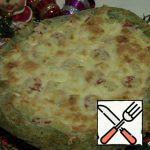 Lush Pizza with Spinach Dough Recipe
 Unusual Pie Pizza Recipe
 Pizza with Ground Turkey Recipe
 Pizza with Smoked Bacon Recipe
 Tart with Salted Cottage Cheese and Herbs Recipe
 Tart with Cottage Cheese and Spinach Recipe
 Pizza “Double Cheeseburger” Recipe